
Install the ECP App
The Edge Compute Platform App isn't installed yet; you've only installed the Management Service that enables you install the apps.
To make the applications available to be installed on your device, you need to add them to your Space. The different applications available can be found in the Marketplace section.
To install the ECP App or any other app needed, follow the next steps.
- From the left hand menu, click Marketplace.
-
Select App - Edge Compute Platform as the first app to
install. Click on the box at the left of the name and click Add to
Space, positioned at the top right of the web page.
The Edge Compute Platform app is added to your space and a What's next pop up message is displayed.
Figure 1. 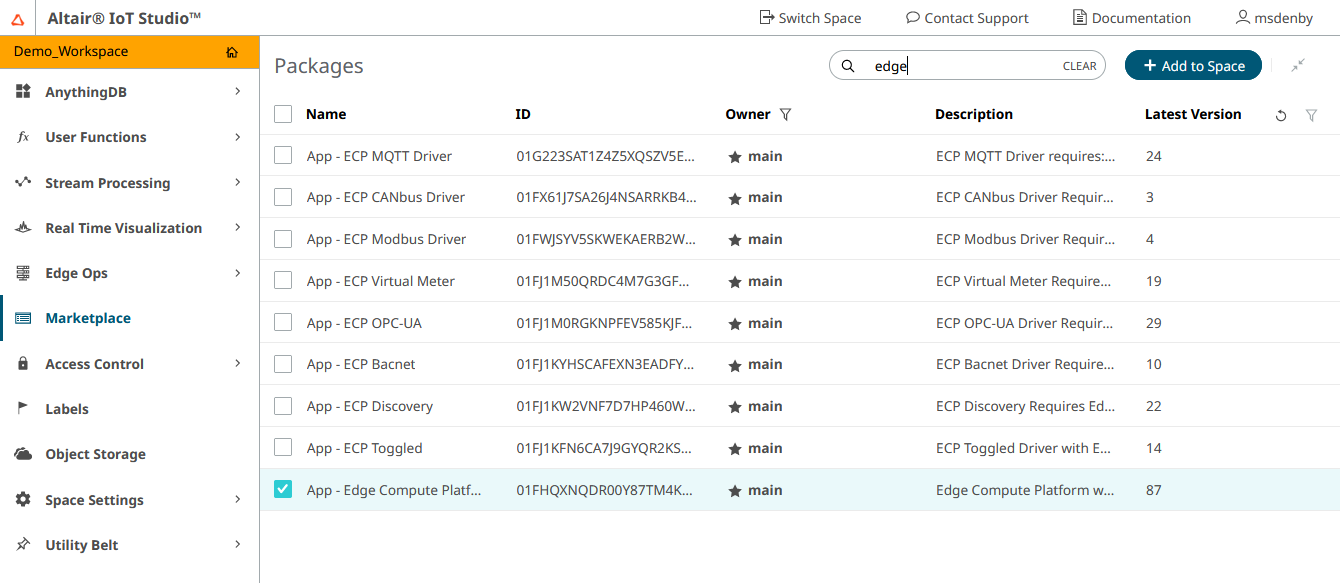
-
Click to access the Edge Applications section.
You will see the App just installed, as in the following image:
Figure 2. 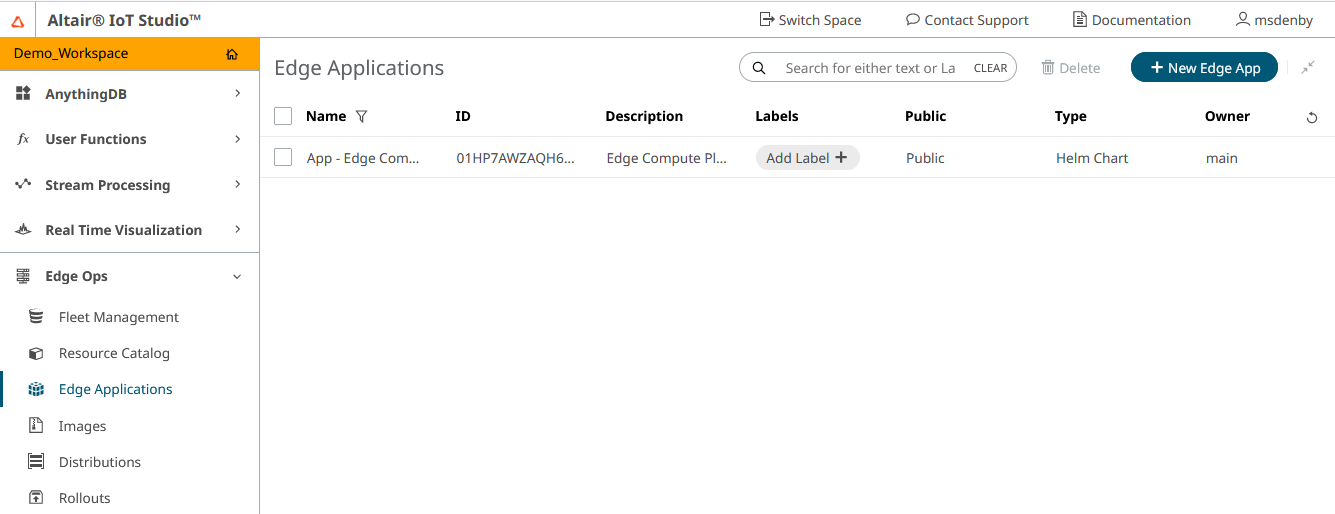
- Before rolling out the Edge Compute Platform app, some configuration needs to be done. A new App is needed to set up the configuration and enable the Edge Compute Platform app to interact with Altair IoT Studio. To do that, click and click on the New App button at the top right corner of the web page.
-
Complete the fields with your data:
Option Description Name Name of the new Access app. Suggested name would be ECP or Edge Compute Platform. Description Description of this new App. Scopes Select category, mqtt, space, and thing in the drop-down list. Type Select Client Credentials. -
Click Save.
Your are directed to the Policies section.
When the App has been created, a Policy needs to be added to it. Policies
indicate what users are permitted to do. If you choose to add the role root
to this app (remember role root allows you to create, read, update, and
delete any resource), the app would also allow you to create, read, update or delete
Categories, Spaces, Things or Property values (MQTT).
-
Click Save.
The information of the new App access is displayed. Check the Details pane to find the following information:
- Client ID: Identification of this new app access.
- Client Secret: Password for this particular app access. You can't modify this field with your own data, but to create a new one, click Reset Client Secret just at the right of this field. Once clicked you will see that the field is filled automatically and if you click on the eye icon in the field you will be able to see the password. Also the password is displayed at the bottom center of the screen in a notification box.
- Save the Client ID and Client Secret in a secure location. You will need those later in the process. You can use the Variables Storage function under Space Settings to store them.