
Deploy the Code at the Edge to Emulate Data Streaming
-
Repeat Steps 1-5 in Configure the ECP App to deploy the
Virtual Meter Edge Application.
- Add the App from the Marketplace.
- Navigate to the Edge Applications section, choose the App - ECP Virtual Meter and create a deployment.
- Choose your Raspberry Pi 4 device from the section and add the new Edge Application from the Applications tab.
Once the Virtual Meter Edge Application is deployed to your device, you
need to define the Thing that is going to represent and store the data from this
virtual meter.
-
Create a new Category in the AnythingDB section named
Meters. Select to add a new Thing to this category,
and choose to skip to schema. Add the following
schema:
{ "@type": [ "swx:Meter", "swx:Virtual" ], "id": "<leave blank when creating a thing>", "title": "Meter", "description": "Virtual Meter", "category": "Meters", "properties": { "UD_DTYPE_KWH_ODM": { "title": "kWh ODM", "type": "number", "readOnly": true }, "UD_DTYPE_KW_AVG": { "title": "kW", "type": "number", "readOnly": true, "minimum": -5, "maximum": 25 }, "dataUsagePollSecs": { "title": "Data Usage Poll Secs", "type": "integer", "readOnly": false } }, "actions": { "correctKwhOdm": { "input": { "title": "Correct the kWh ODM value", "type": "object", "properties": { "newValue": { "title": "The new value", "type": "number" } } } } }, "events": { "negativeKw": { "title": "Negative kW", "description": "kW Usage is Negative", "data": { "type": "number" } } } } -
Sync this Thing to the Virtual Meter application.
-
Add a Label to this Thing.
Figure 1. 
-
Navigate to the Fleet Management section, choose your Raspberry Pi 4
Thing and click Synced Things.
Figure 2. 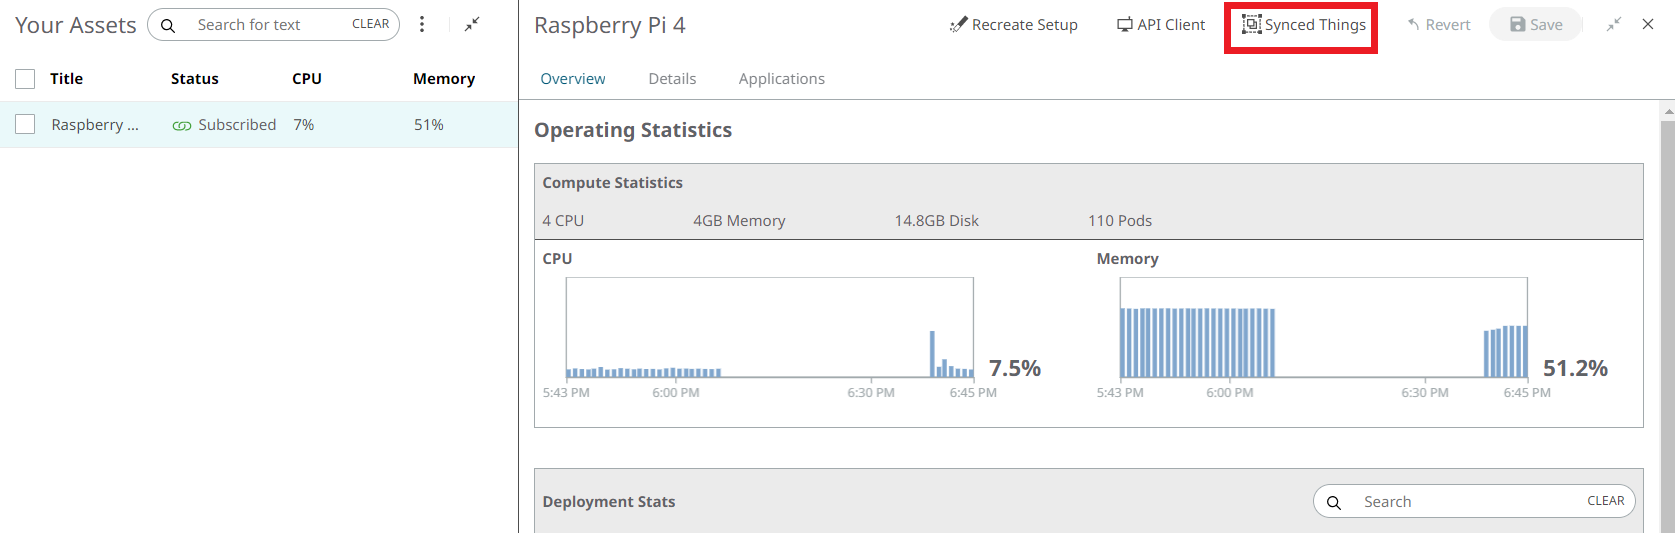
-
Click Add and choose the label you have just
created and assigned to the Thing.
Figure 3. 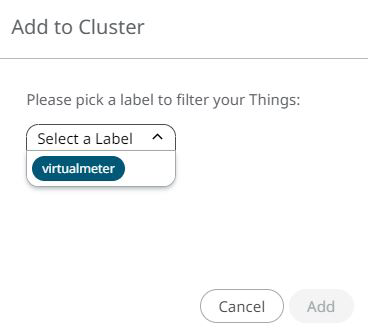
When completed, a pop up message is displayed and the synchronized Things are shown in the list.Figure 4. 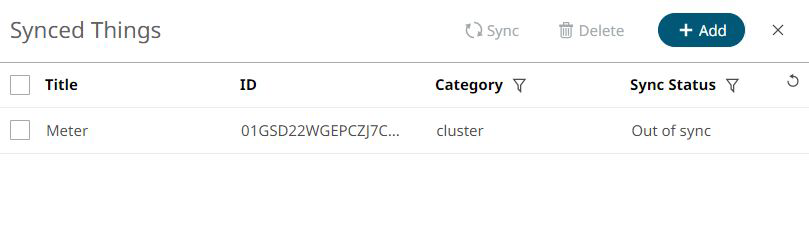
-
Return to AnythingDB and confirm that the data is coming to your
Virtual Meter Device every 10 minutes:
Figure 5. 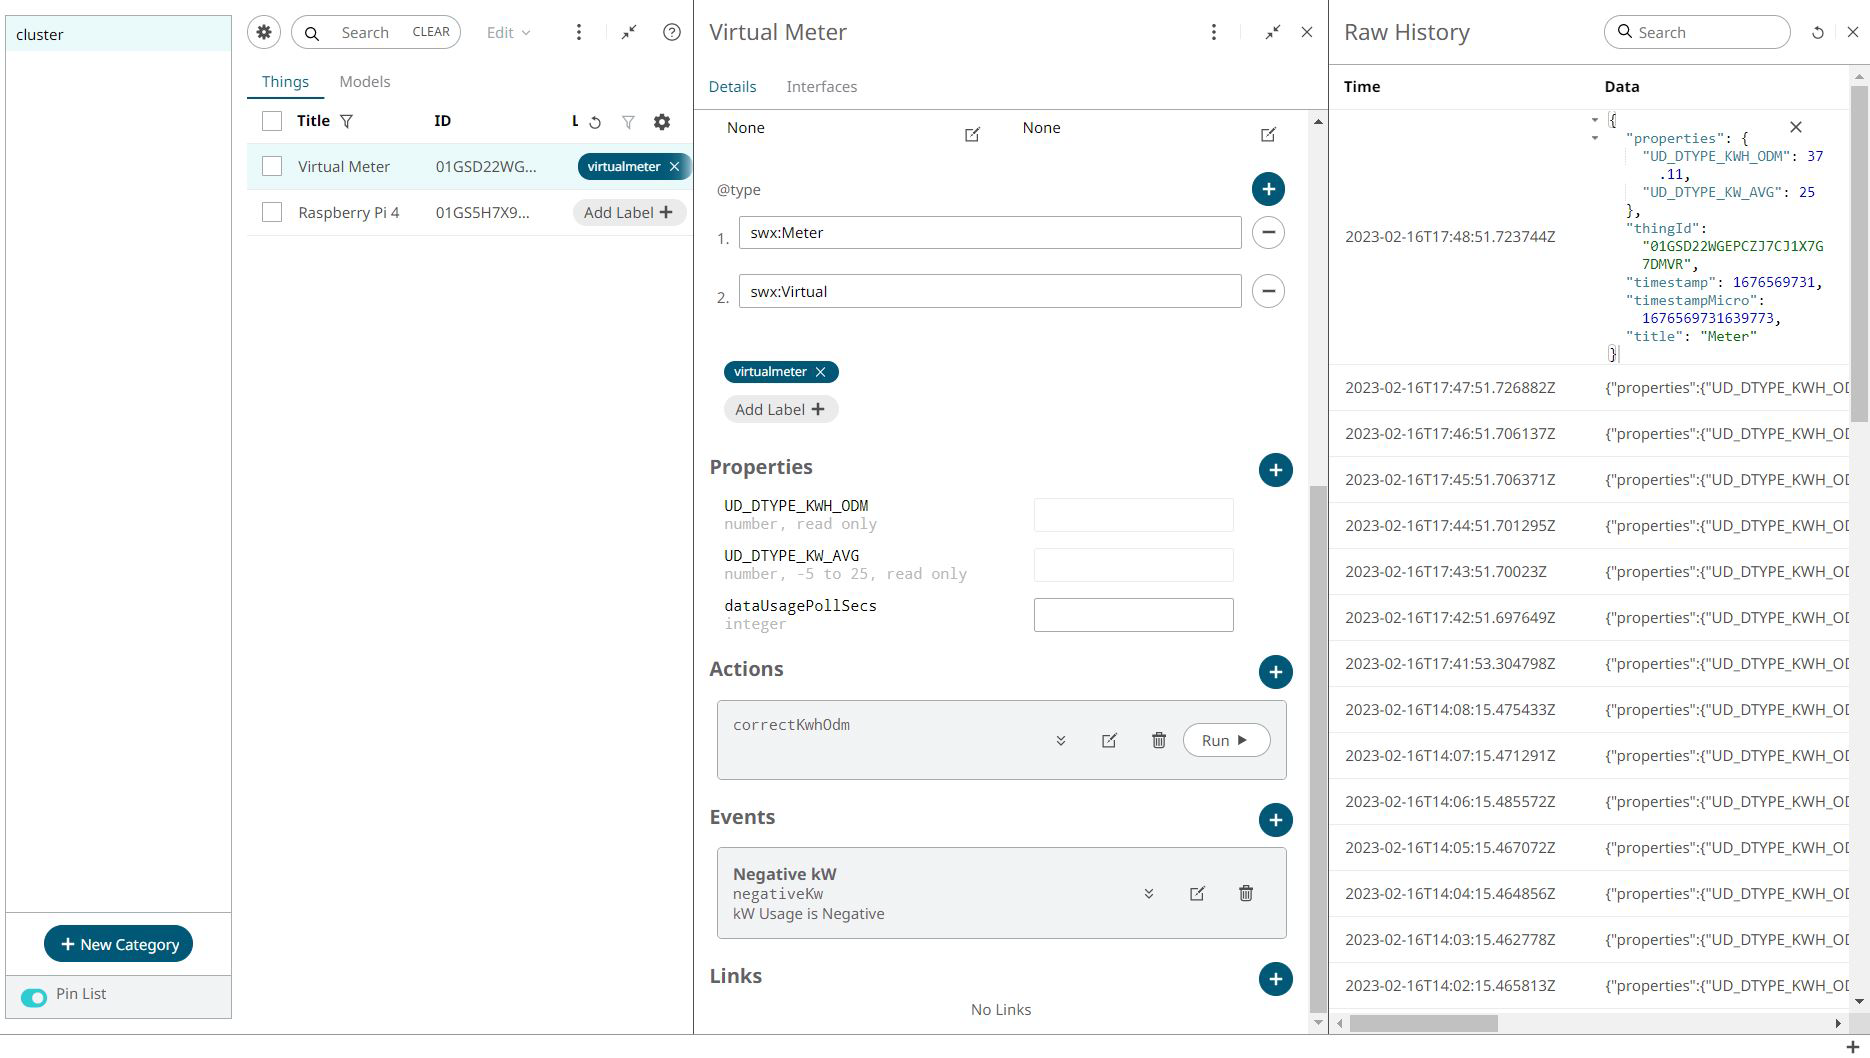
Note: If you add new Things to your Category to be synced using the same label, you need to repeat this last step.
-
Add a Label to this Thing.