Rollouts
A Rollout is the only way to install distributions. It defines which Distribution should be deployed to which Fleet of Assets. You can access Rollouts by expanding the EdgeOps section.
To deploy a Rollout, all the Assets need to have the Edge Updater service running.
An Asset with Updater Service can be created individually in Studio or by using a USB installer Image for Fleet Deployments.
Create a Rollout
-
From the panel, click New Rollout.

The New Rollout panel opens. -
Enter a Name and select the Fleet Identifier you used when creating the Assets.
Select the desired Distribution and click Save.
Figure 1. 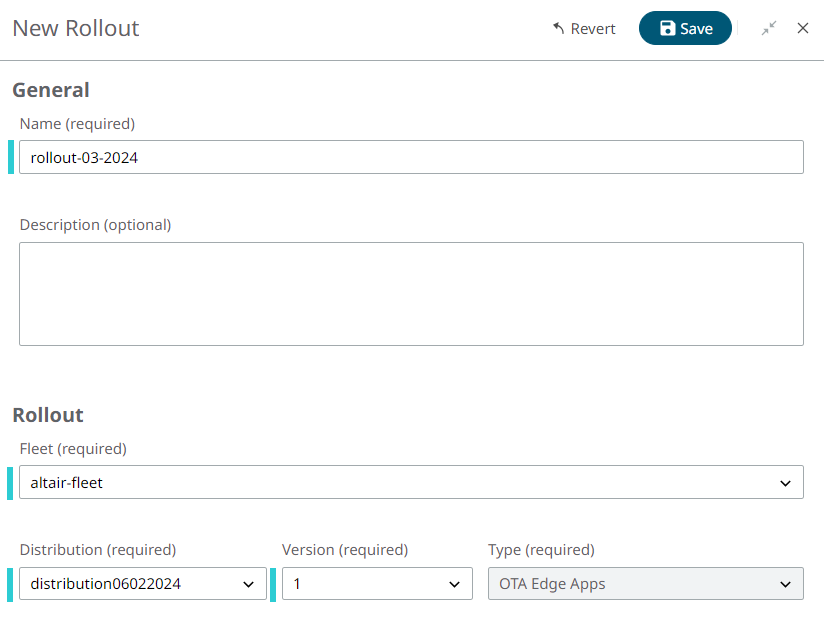
-
Once the Rollout has status "ready", it can be deployed to the Fleet Assets.
Figure 2. 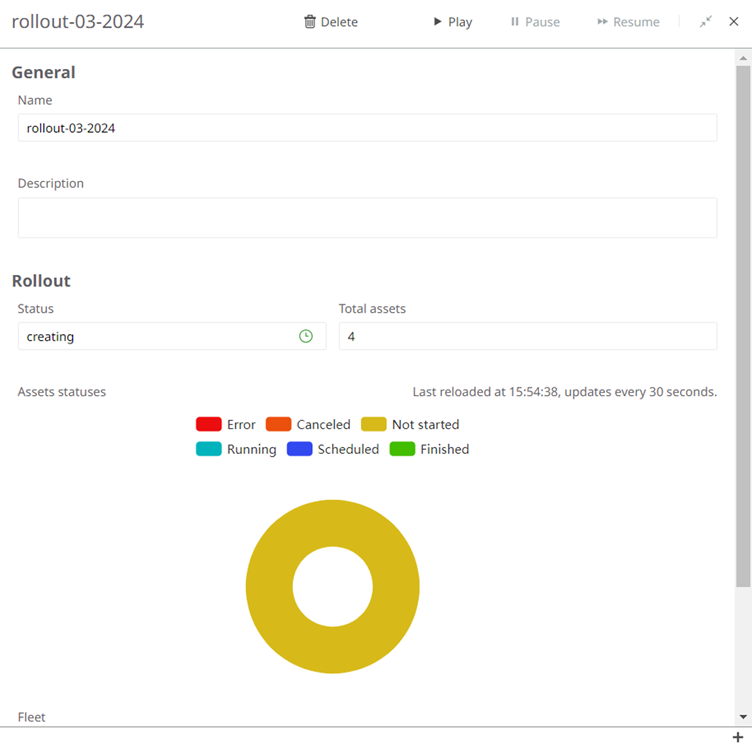
At the top of the pane are three buttons:- Play: Start the Rollout
- Pause: Pause the Rollout in progress (that is, remaining Assets to be updated will not receive the updates)
- Resume: Continue the Rollout and deploy to the remaining Assets
Once Play has been clicked, the Rollout will go into "running" mode. The Fleet Assets poll the update server, and at the next poll request the Asset will be sent the update files and instructions.The Rollout details pane will show how many Assets were found as part of this Fleet.
The Assets statuses graph will be automatically updated every 30 seconds until the Rollout is completed.Figure 3. Rollout complete 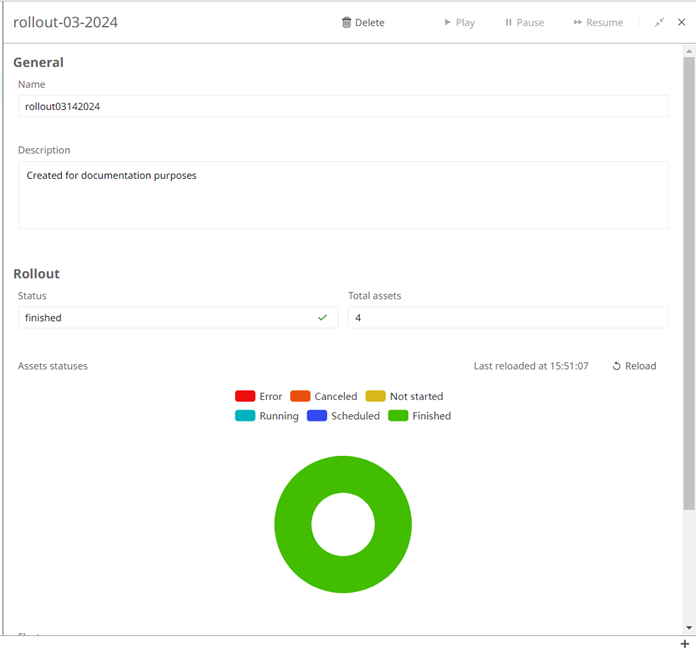
Tip: Rollouts are standalone; they are not versioned like Distributions. When you have a new Distribution you want to deploy to your Fleet, you need to create a new Rollout, specifying the same Fleet Identifier and the Distribution version desired.
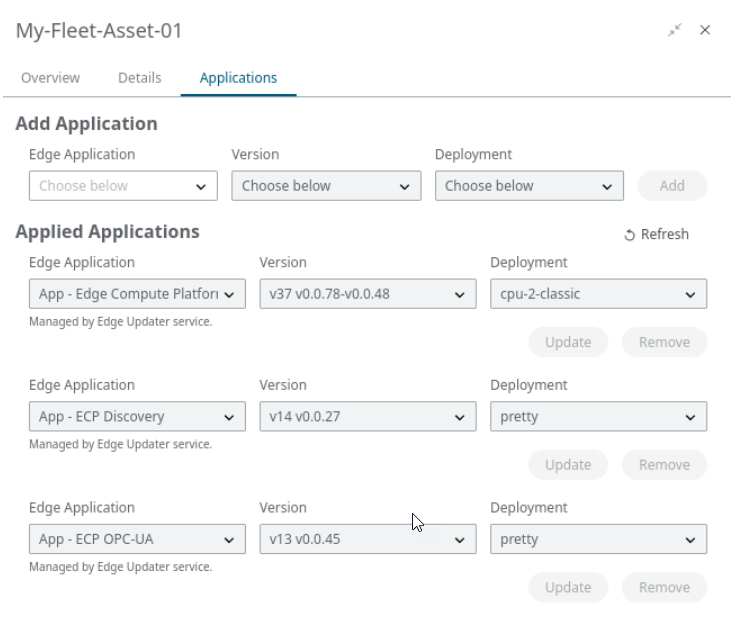
Post Rollout Deployment
- Open the Rollout details pane.
-
Click and access the Details pane of one of the Assets of this Fleet
and go to the Applications tab. You see that the
applications that were part of the distributions chosen for rollout have been
installed. They cannot be manually updated or removed from this tab and a
"Managed by Edge Updater service" notice is displayed. If you want to make
changes you need to use the Rollout mechanism.
Figure 4.