
Triggers
Triggers work as listeners that monitor specific events or changes to automatically invoke functions in response. They convert incoming events to HTTP requests to asynchronously invoke all the Functions that match certain criteria.
You will need to define either an MQTT trigger or a Cron trigger, depending on what you have defined in your Function.
MQTT Trigger
If you have defined an MQTT topic as the event trigger that will initiate the execution of your Function, you need to create an MQTT trigger to listen to that particular MQTT topic.
The MQTT Trigger will connect to an MQTT broker and create a subscription to the topics defined on it. You can use multiple topics per Trigger and use wildcards to keep things simple.
When a message is received, the Trigger will compare the topic of that message with the topics configured in the Functions. All the matching Functions will be invoked.
When a MQTT Trigger invokes a Function, the payload of the MQTT message is sent as the body of the HTTP invocation request. The topic of the message is sent in the X-Topic header of the request.
You have the option to specify a callback URL where the trigger will send notifications or data payloads when certain events occur. This callback URL acts as a point of contact for receiving information from the trigger. You can use the webhook website to generate your unique URL for easily inspect and test the incoming requests.
Create an MQTT Trigger
Complete the steps below to create a Trigger.
- Click .
-
Click New Trigger.

-
In the New Event Trigger panel, enter the Trigger
description and type.
Figure 1. 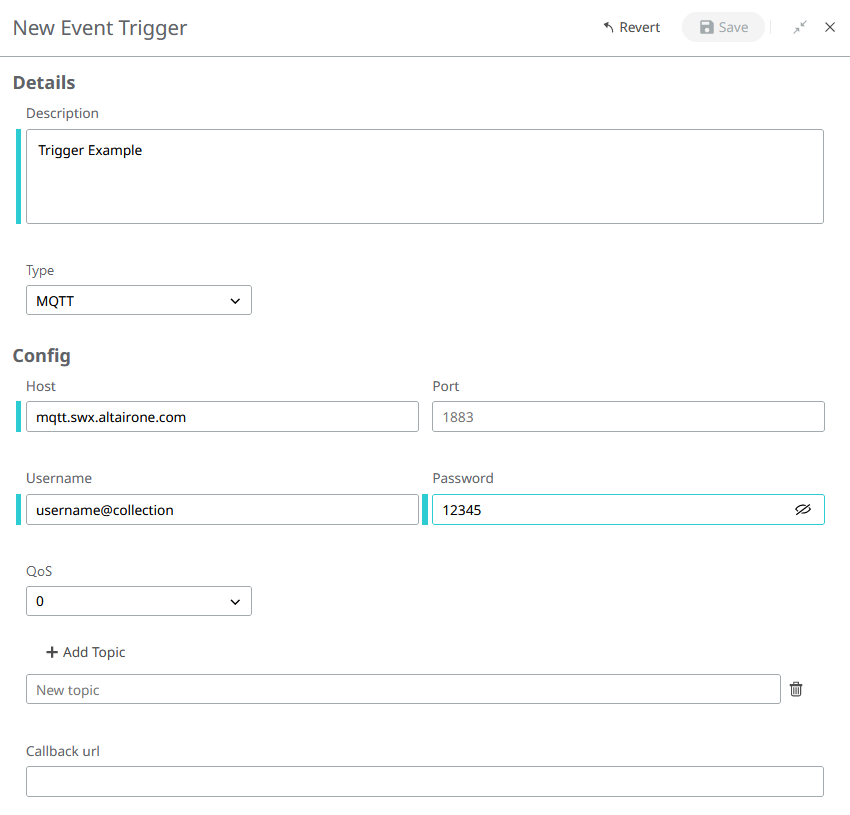
-
If you are using the MQTT broker provided by IoT Studio, enter the following
values:
-
Under Add Topic, enter the MQTT topic.
Figure 2. 
This endpoint must be the same as the Event Trigger in Functions.
-
Under Add Topic, enter the MQTT topic.
- You have the option to specify a callback URL where the trigger will send notifications or data payloads when certain events occur. This callback URL acts as a point of contact for receiving information from the trigger. You can use the webhook website to generate your unique URL for easily inspect and test the incoming requests.
-
Click Save.
The Trigger status will change to
Running.Note: If a User changes the credentials, the Trigger's status can change toFailed.
Cron Trigger
*/10 * * * *to fire the Function every 10 minutes.0 0 1 * *to fire the Function once at 00:00 on the first of each month.0 0 * * 3to fire the Function at 00:00 every Wednesday.
@yearlyor@annually@monthly@weekly@dailyor@midnight@hourly
Create a Cron Trigger
Cron Triggers require no configuration, so just one Cron Trigger can be created for space. Once you have created a Cron Trigger, the option to add a new Cron Trigger will disappear from the type drop-down menu.
- Click .
-
Click Add.
Figure 3. 
- In the New Event Trigger panel, enter the Trigger description.
-
From the Type drop down menu, select Cron.
Figure 4. 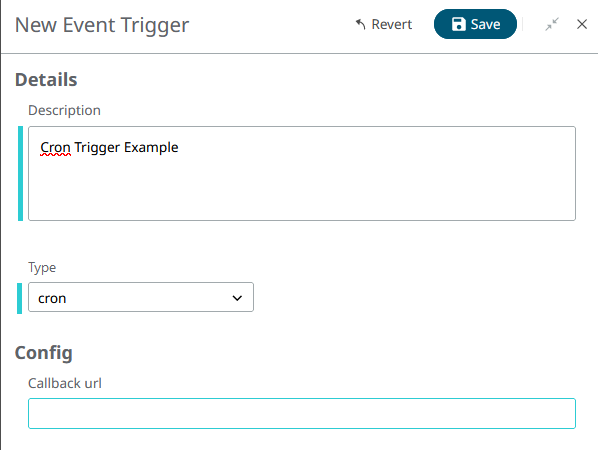
- Click Save.