
Create an Asset On Bare Metal
Before installing on bare metal, you will first need to create an App (an App is a set of permissions needed to ensure that the access to data is secure and that the user is authorized to perform the request).
-
Click and create a new App by following these steps.
The app should have "cluster" as the scope and the type should be set to "client credentials." The Application Client ID and Secret ID are required in configuring the Image. Be sure to capture and save this information when creating the App.
Once you choose to create a new Asset on Bare Metal, the new ECP Image panel opens as an installable image needs to be created, downloaded, and flashed to a USB drive using balenaEtcher to install on bare metal.
-
Under Details, enter the following:
- Title: Image name
- Description: Image description
-
Under Build Params, enter the following:
- Public SSH Key(s) (each on a new line) for being able to SSH into the gateway on the local network using the "altair" username and the public SSH key of the gateway.
- App Client and App Client Secret: Select App client from the drop down and enter the App Client Secret.
- Fleet Identifier: A common identifier for all Assets in the Fleet
-
Click Save.
Figure 1. 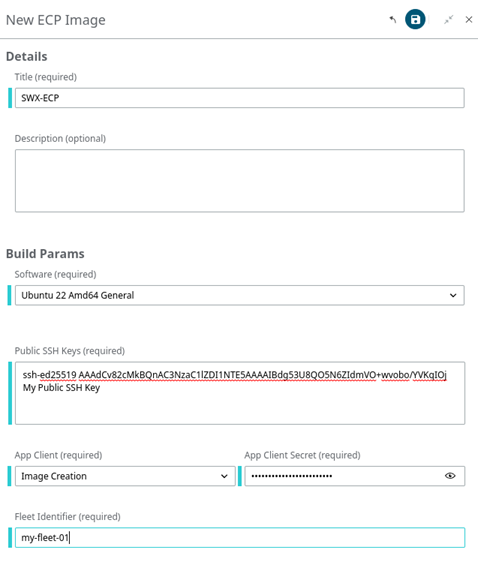
When the new Image is created, it will be displayed in the form and can be downloaded.Figure 2. 
The table includes the following columns:- Title
- ID: Image ID
- Status
- Submitted
- Executing
- Execution_completed
- Created: Image creation date and time
- Expires: Time remaining for the image to be expired. Note: Images expire after 7 days.
- Download: You can download the Image by clicking the download icon in this column. You can also download an Image by clicking the Download action in the Detail pane.
- Flash the Image to a USB drive using balenaEtcher.
-
Run the commands that appeared in Altair IoT Studio on the hardware's
shell, simply copy/paste if possible. These commands will allow you to deploy
the Management Server on the Asset and connect to Altair IoT Studio:
Figure 3. 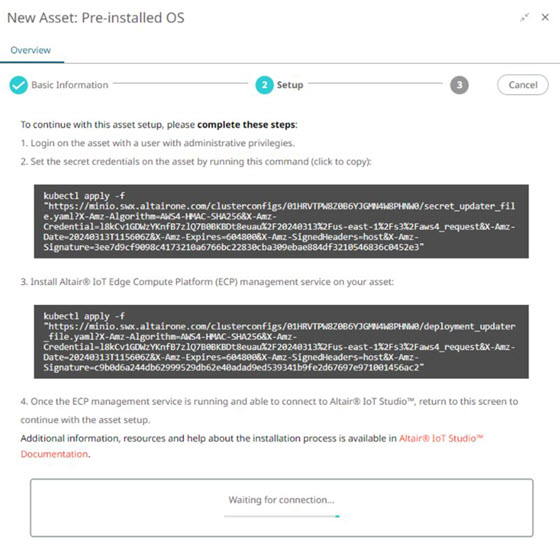
-
When the Asset has successfully established connection
with Altair IoT Studio, the following message will appear. Select the
Next button to continue.
Figure 4.  You will be taken then to the Asset's monitoring page. This is where you can see it's operating statistics and deployments.
Figure 5. 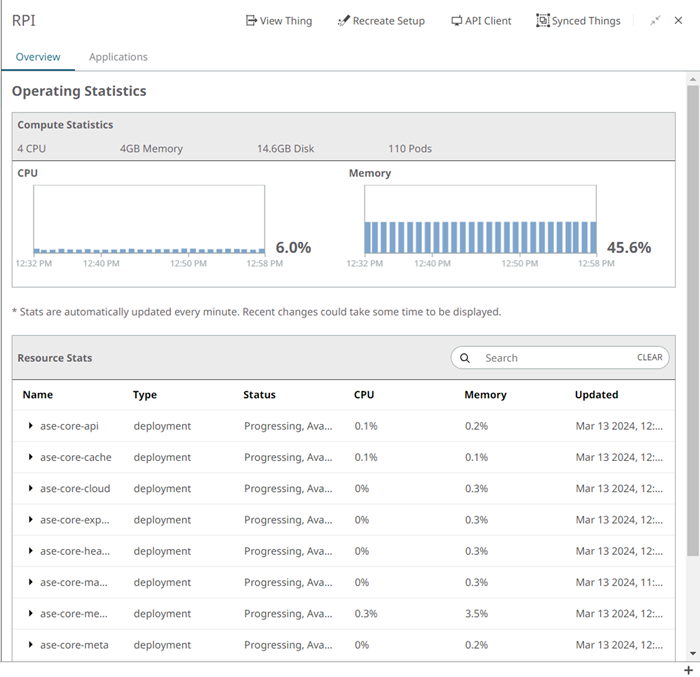 On the header you can find the following options:
- View Thing: Redirect to the Thing in AnythingDB that represents your asset. This Thing is automatically created. More details can be found here.
- Recreate Setup: Recreate the configuration. Note this should only be used if there is no longer a valid edge device.
- API Client: Opens the API Client pane where REST API calls to the Edge Compute Platform running on the Asset can be made. More info can be found here.
- Synced Things: Any Thing created in AnythingDB exists on the cloud only. To use the Thing at the Edge it needs to be synchronized to the Edge. Use this option to do the synchronization. More info can be found here.